NVME - EC2 Test
Test-EC2
-
Update Package List
- Command:
sudo apt-get update - Purpose: Refreshes the repository index. This ensures you get the latest version of packages.
- Note: Always recommended before installing new packages.
- Command:
-
Install NVMe Command Line Interface
- Command:
sudo apt-get -y install nvme-cli - Purpose: Installs the nvme-cli package, providing tools to manage NVMe drives.
- Note: The -y flag automates the process by automatically accepting prompts.
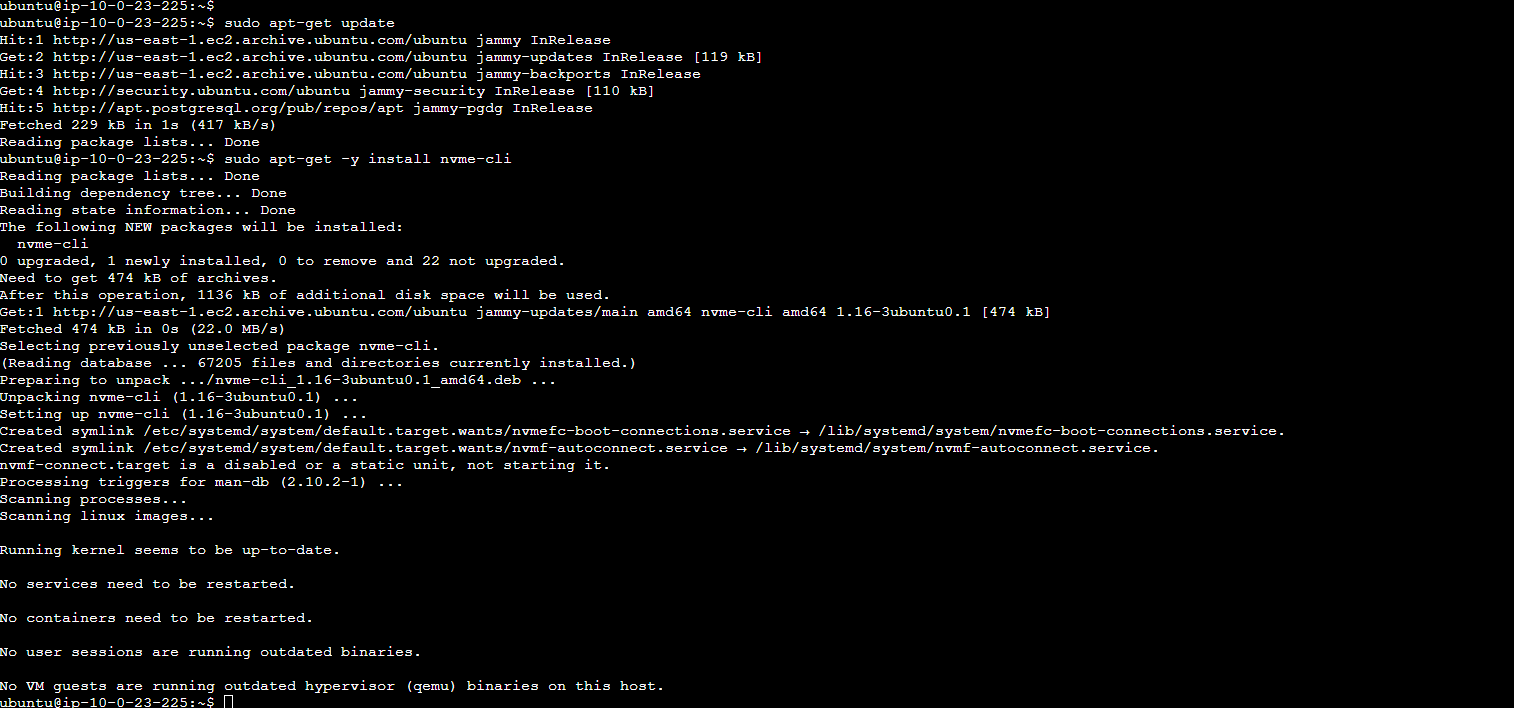
- Command:
-
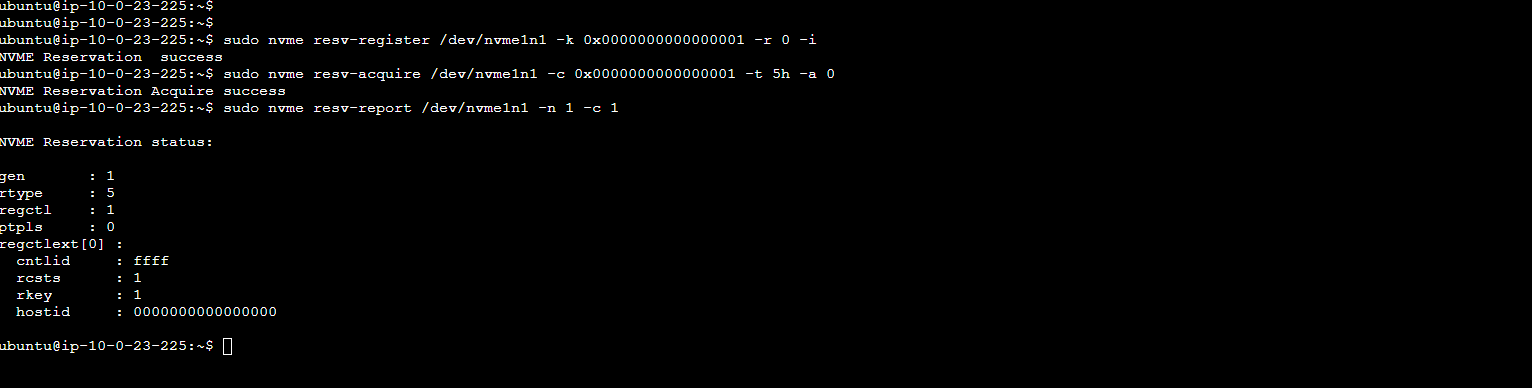
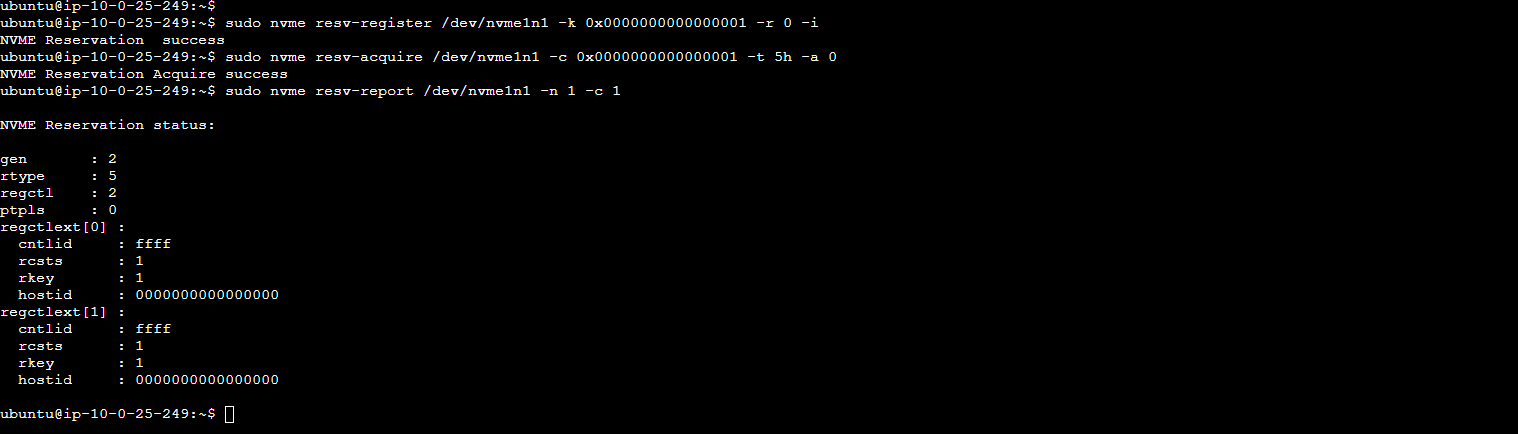
Register Reservation Key on NVMe Drive
- Command:
sudo nvme resv-register /dev/nvme1n1 -k 0x0000000000000001 -r 0 -i - Components:
- /dev/nvme1n1: Identifies the NVMe drive.
- -k 0x0000000000000001: Sets the reservation key.
- -r 0: Specifies the register action (0 reserved).
- -i: Incomplete; used for additional input options.
- Note: Ensure all parameters are accurately set for your specific requirements.
- Command:
-
Acquire Reservation on NVMe Drive
- Command:
sudo nvme resv-acquire /dev/nvme1n1 -c 0x0000000000000001 -t 5h -a 0 - Components:
- -c 0x0000000000000001: Current key to acquire the reservation.
- -t 5h: Sets the reservation type (‘5h’ may not be accurate).
- -a 0: Specifies the action.
- Note: Check the format of -t 5h as it seems to be incorrect.
- Command:
-
Report Reservation on NVMe Drive
- Command:
sudo nvme resv-report /dev/nvme1n1 -n 1 -c 1 - Components:
- -n 1: The number of reservation status data structures to return.
- -c 1: May indicate a concise format of the report.
- Note: Customize the command according to your reporting needs.
- Command: