Creating a Test VPC
Creating a Test VPC
-
Access the Amazon VPC Console:
-
Visit the Amazon VPC dashboard at AWS VPC Console.
-
Initiate VPC Creation:
- On the VPC dashboard, select Create VPC.
-
Specify Resources:
- For Resources to create, choose VPC and more.
-
Configure Name Tag:
- Keep Name tag auto-generation selected to automatically create name tags for VPC resources, or deselect to provide custom name tags.
-
Set Up IPv4 CIDR Block:
- Enter the IPv4 address range for the VPC. This is mandatory as VPC requires an IPv4 range.
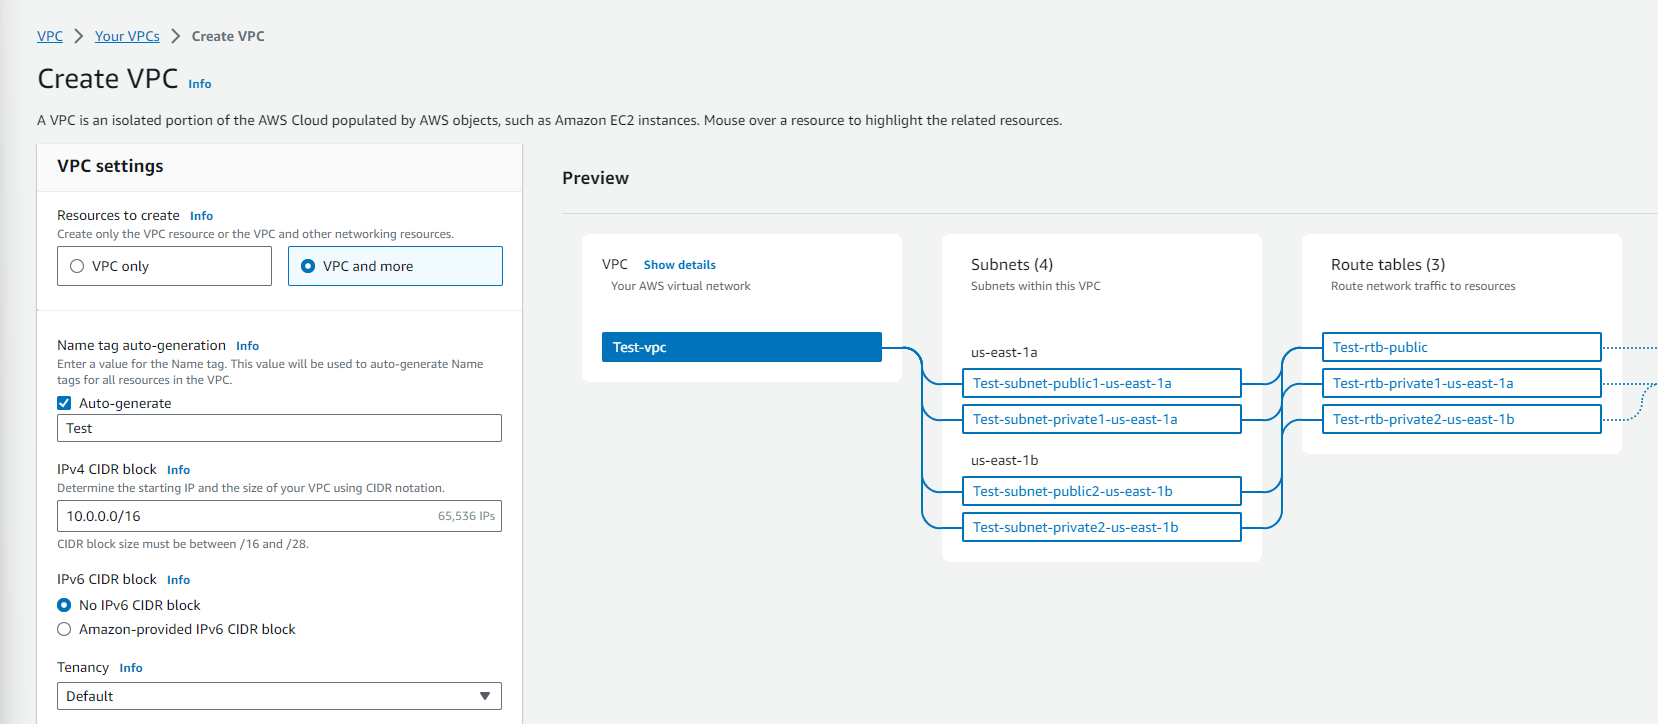
- Configure IPv6 (Optional):
- To support IPv6, select IPv6 CIDR block and choose Amazon-provided IPv6 CIDR block.
- Choose Tenancy:
- Select a tenancy option, determining whether EC2 instances will run on shared or dedicated hardware.
- Default Tenancy: Instances use the tenancy attribute specified at launch.
- Dedicated Tenancy: Instances always run as Dedicated Instances.
- Set Availability Zones:
- To ensure diversity in a production environment, have subnets in at least two Availability Zones (AZs).
- You may manually select AZs or allow AWS to choose them.
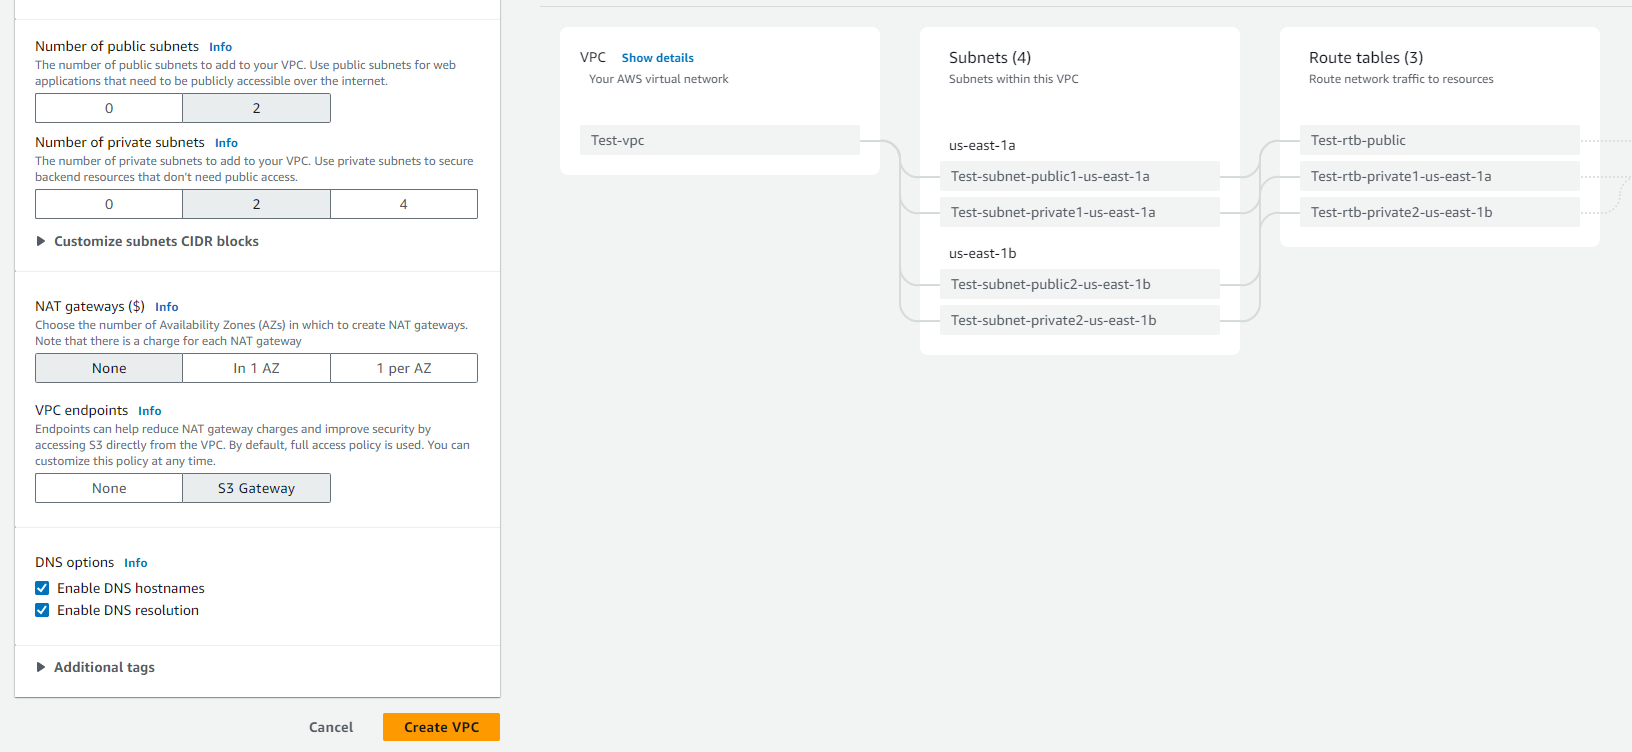
- Configure Subnets:
- Choose the number of public and private subnets.
- You can customize the CIDR blocks for subnets or let AWS select them.
- Configure NAT Gateway (Optional):
- If private subnets need IPv4 internet access, decide the number of NAT gateways per AZ.
- Remember, NAT gateways incur additional costs.
- Egress-Only Internet Gateway (Optional):
- If private subnets need IPv6 internet access, select Yes for the Egress-only internet gateway.
- Set up VPC Endpoints for S3 (Optional):
- Choose VPC endpoints, S3 Gateway for direct access to Amazon S3 from your VPC.
- DNS Options (Optional):
- Adjust DNS options if the default settings do not meet your requirements.
- Add Additional Tags (Optional):
- Expand Additional tags, select Add new tag, and enter the key and value for the tag.
- Review Configuration in Preview Pane:
- The Preview Pane shows the relationships between VPC resources. Solid lines indicate resource connections, while dashed lines represent network traffic paths.
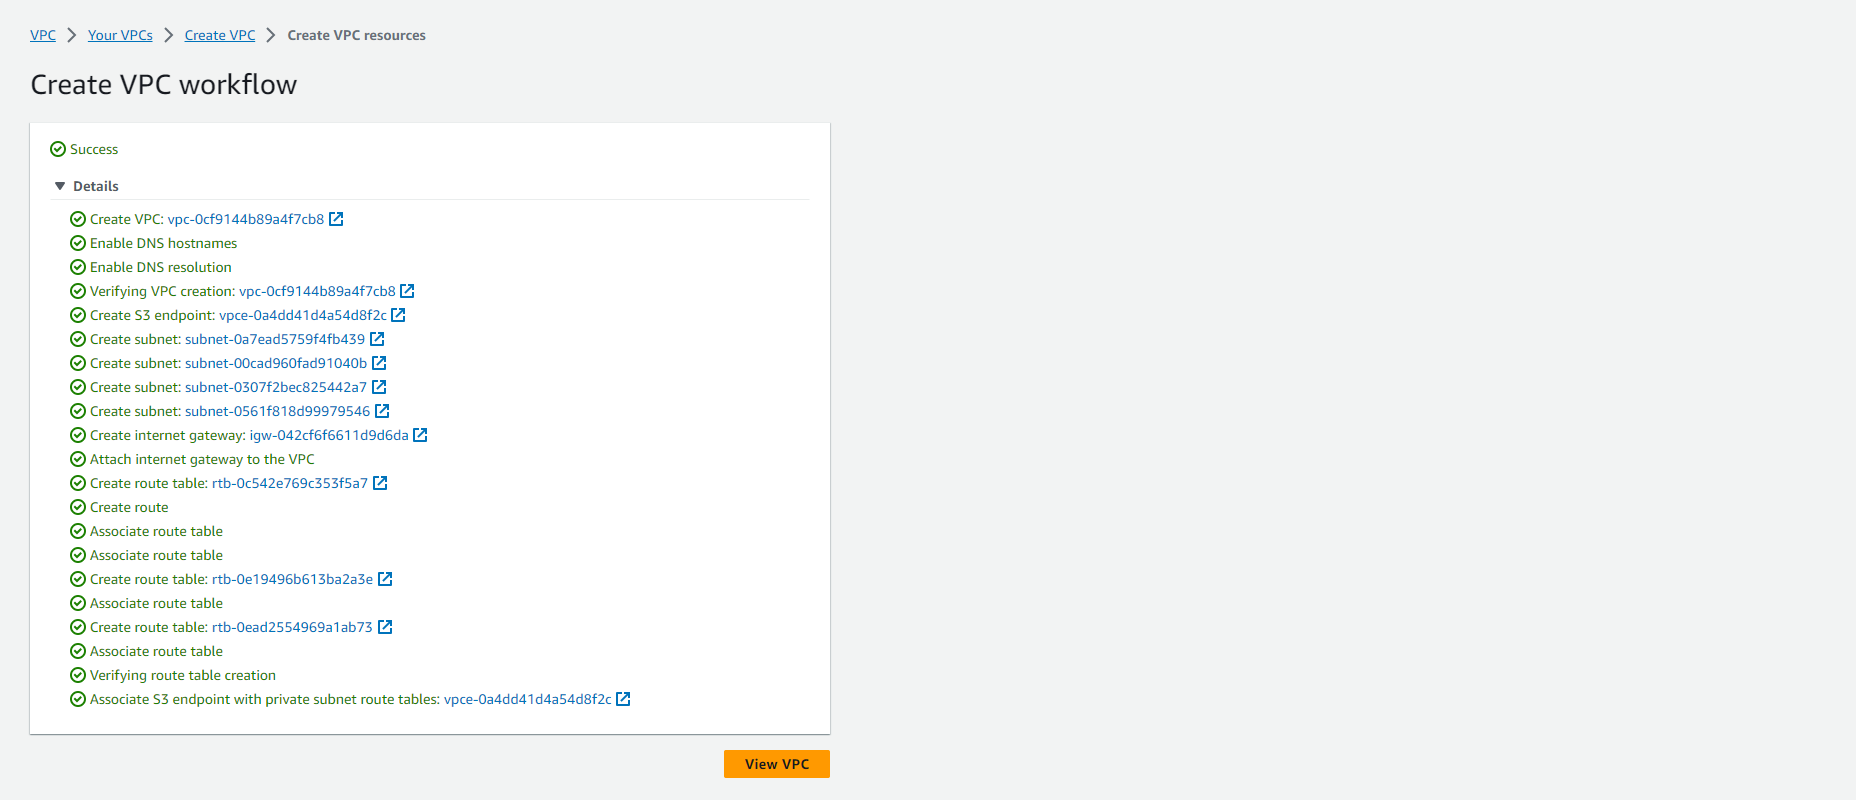
- Create VPC:
- Once you have configured the VPC to your specifications, press Create VPC.